Composition is definitely one of the most important aspect of photography. Anyone can click a button on a camera, but only a photographer can properly compose a photo into a form of art. Mastering composition is absolutely essential for success as a photographer, and it is very simple to learn as long as you are willing to put in the time to practice. As you continue to take photos over time, your eye will develop the ability to see compositions in nature. In this article you will read about composition tips and techniques, and how they apply in different situations and with different camera settings.
What is composition?
Photographic composition is the organization of visual elements within the frame of a photo. There are many techniques and strategies to help properly compose photos and make them more appealing to the eye. The reason why composition is so important to master is that it grabs the viewer’s attention and affects the way the photo is perceived. It can change a normal nature scene into a work of art. It is one of the most challenging photography skills, but it is what sets apart an expert from an amateur.
1. Rule of Thirds
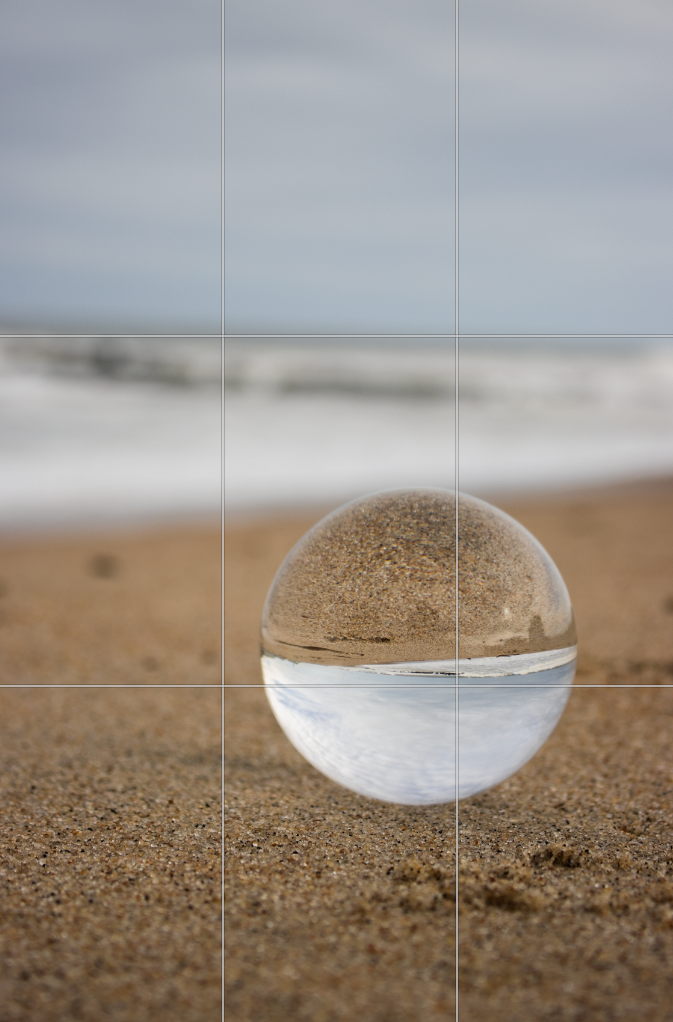
The rule of thirds is one of the most standard and rules of composition, and using it can change the entire look of the photo. It is a guideline that divides the photo into thirds vertically and horizontally. The subject should be placed on one of the four points of intersection of the lines. This will leave the other two thirds of the image more open, therefore creating a more appealing photo. This rule does not only have to be used for subject, as it can also be used to help you place the horizon. In the image to the left, the horizon is lined up with the top third, instead of splitting the photo directly.
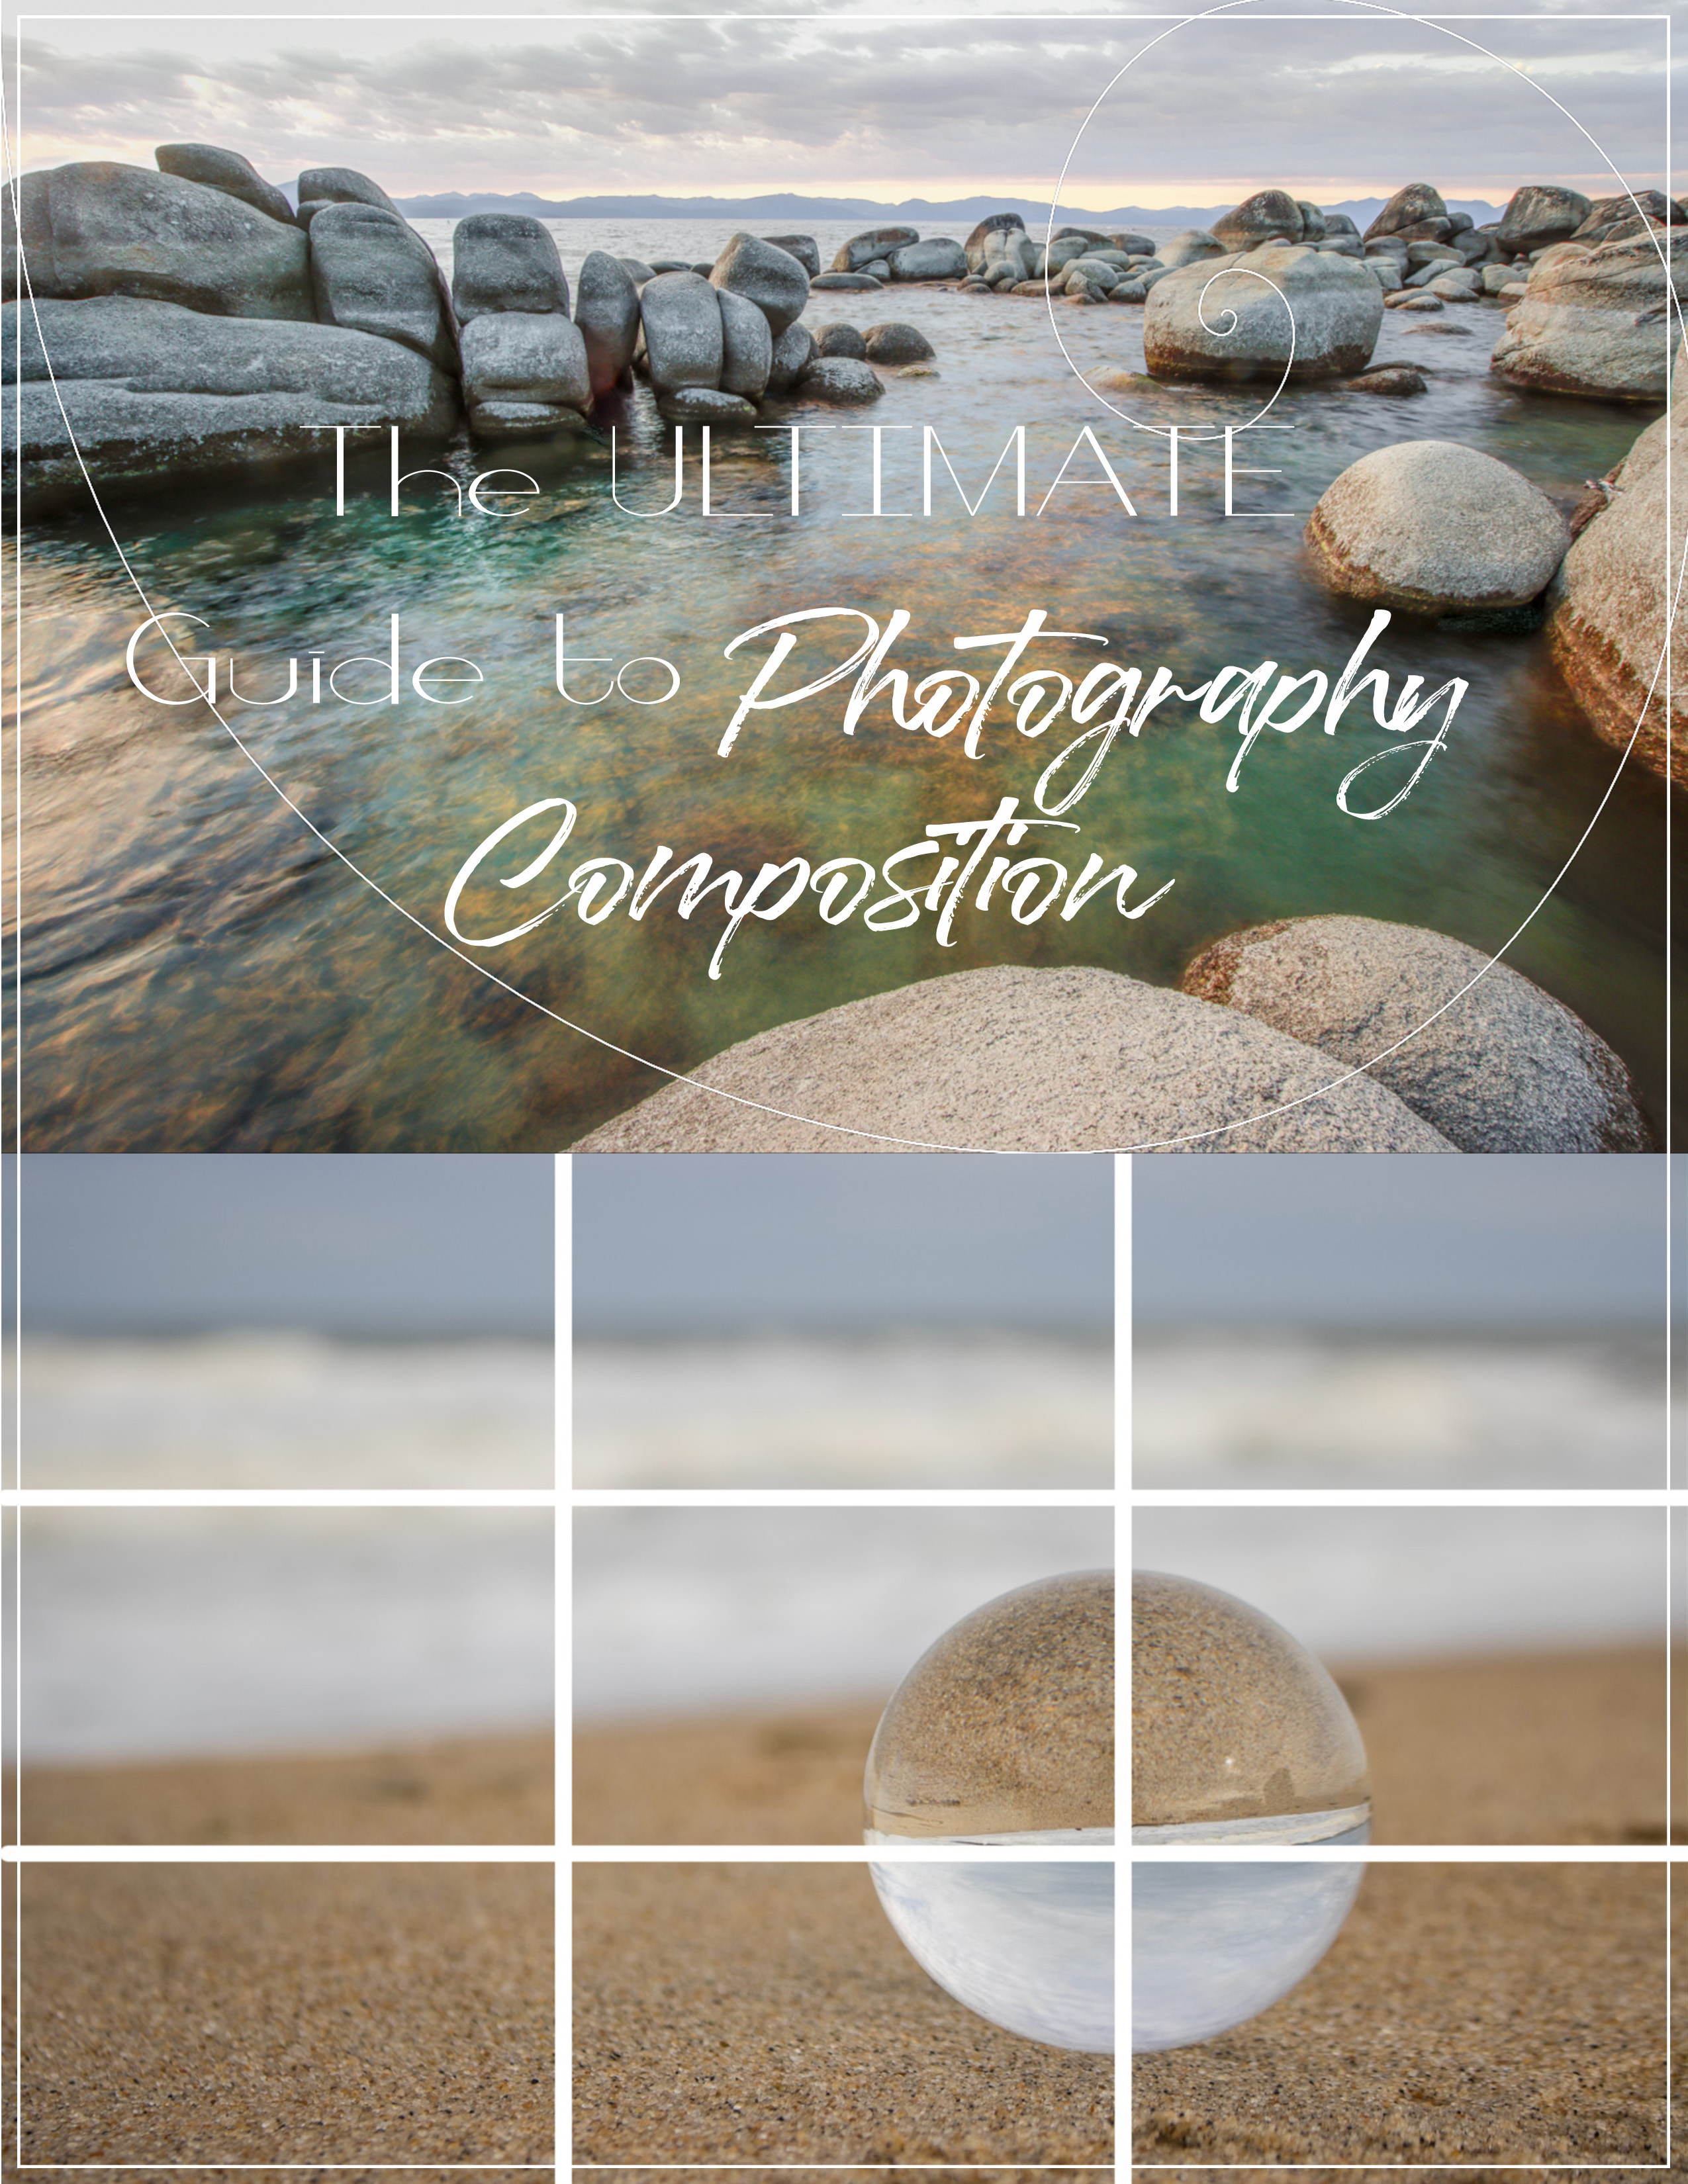
2. Golden Spiral
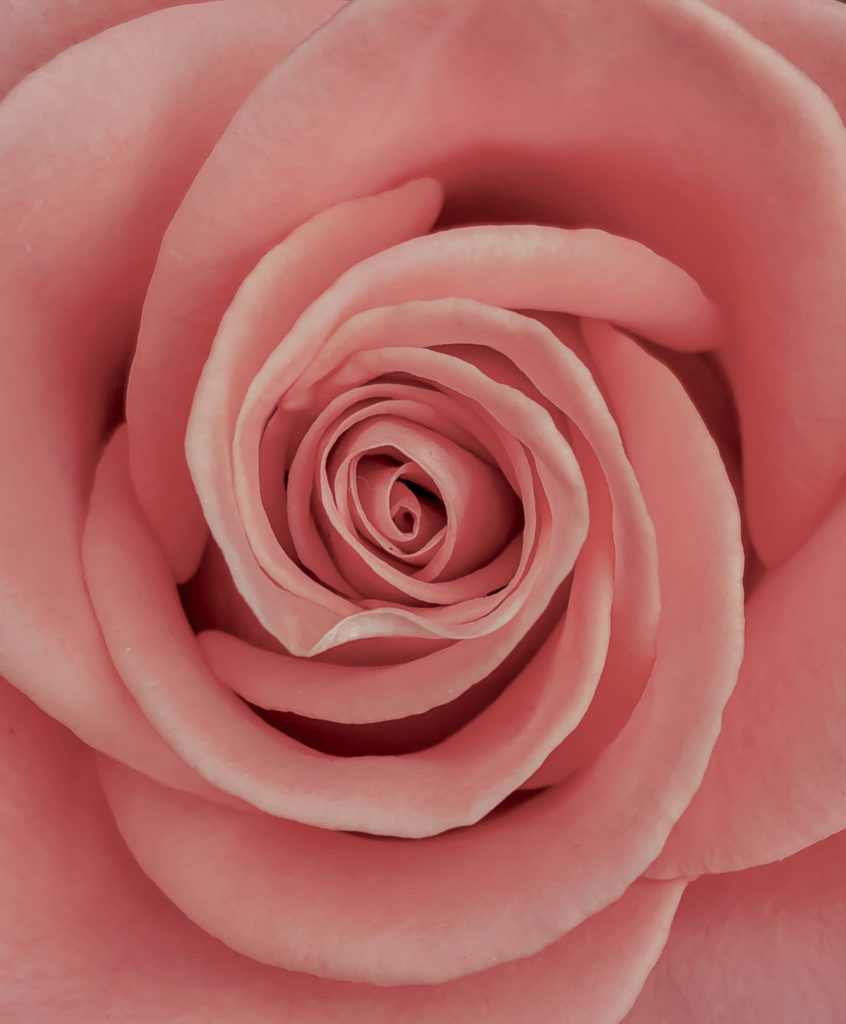
The golden spiral is another guideline like the rule of thirds. It provides a good visualization of how you should place your subject. The focal point of the photo should be lined up with the center of the spiral, creating a nicely balanced composition. By using the golden spiral, the viewer’s eye will move easily throughout the photo.
3. Leading Lines
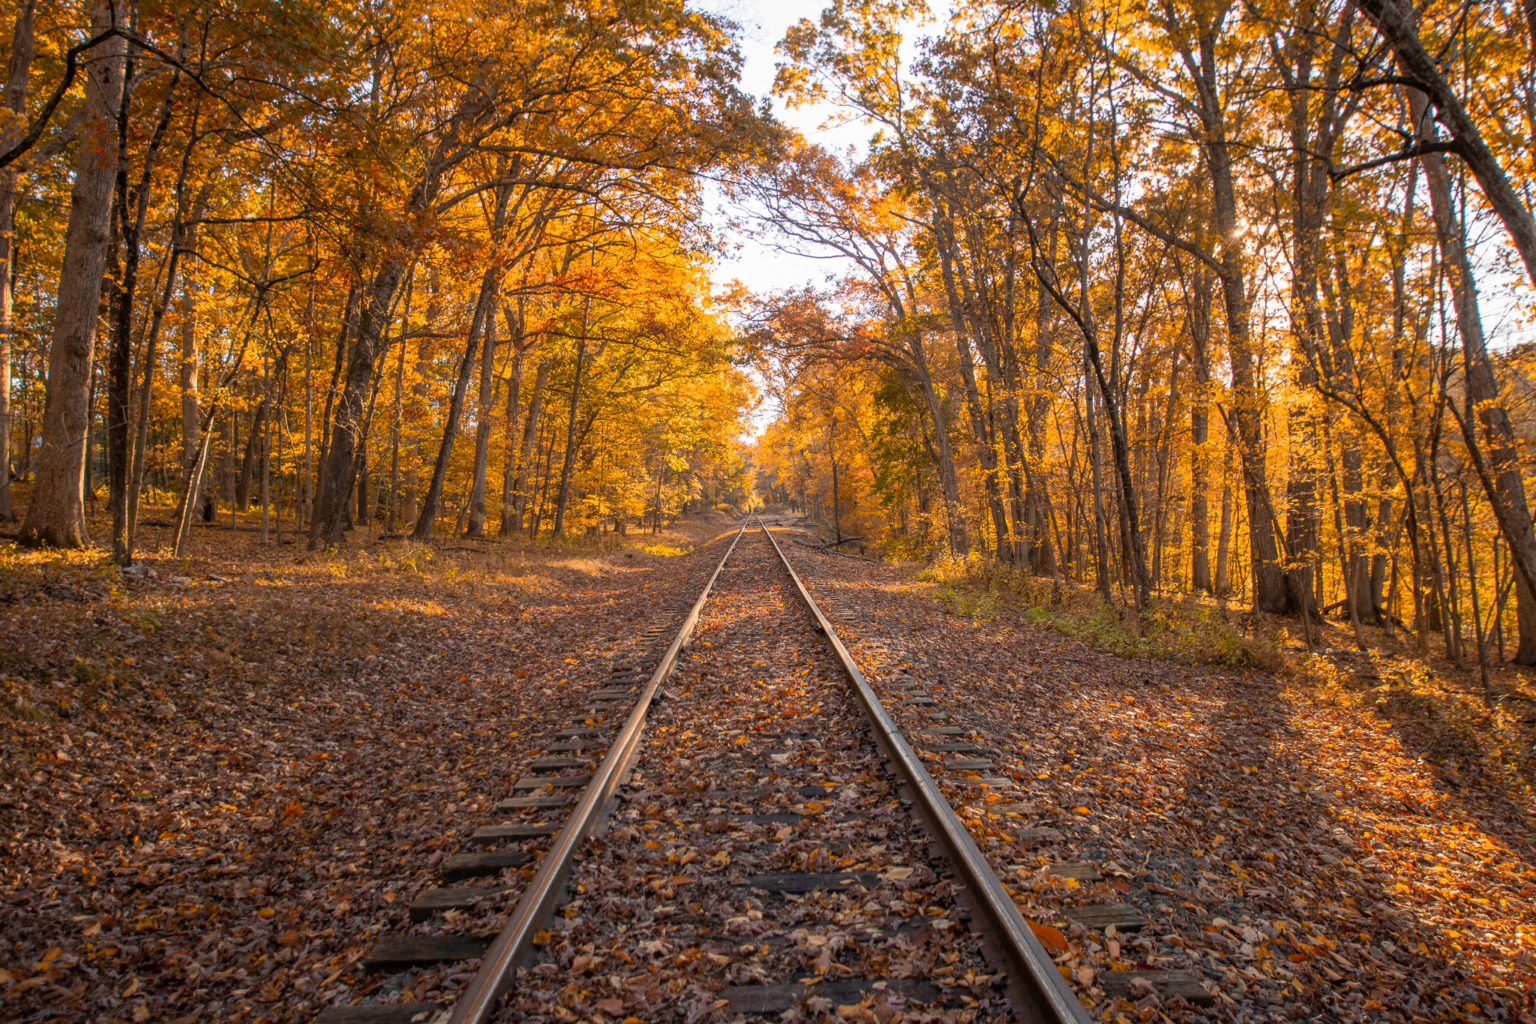
Another great technique to keep in mind when shooting is leading lines. Leading lines are natural lines in a scene that lead the viewer’s eyes to the focus of the image. They often create depth and symmetry, enhancing the quality of the photo. Roads, railroads, shorelines, bridges, and fences are just a few examples, but there are many more that can be found in everyday nature.
4. Symmetry
Symmetry is a very powerful element of composition. Even though it directly goes against the rule of thirds, if it is used stylistically, it can change a picture into a work of art. A photo is symmetrical when both halves of the photo are equal, or mirror each other. It makes a photo look clean, balanced, and proportional. Symmetry can be radial, where the photo is symmetrical from a central axis; or it can be bilateral, where two halves of the photo are the same, as shown in the photo to the right.
5. Simplicity and Negative Space
The use of negative space in photography can help isolate the subject and draw the eye towards it. The viewer will not only notice the subject, but also the empty space behind it. Embracing negative space will make your photo easier to look at, and have less distractions that take away from the focus of the photo. Negative space does not only have to be a plain background; it can be grass, the sky, water, and other textured backgrounds. You can also create your own negative space by using a wide aperture to blur out the background behind the subject. It is a good idea to try combining this technique with the rule of thirds to add some interest to the simplicity of the photo. In addition, the use of light is very important in negative space photography. Shadows can emphasize the subject in a very dramatic way and tie together the relationship between the subject and the empty space.
6. Rule of Space
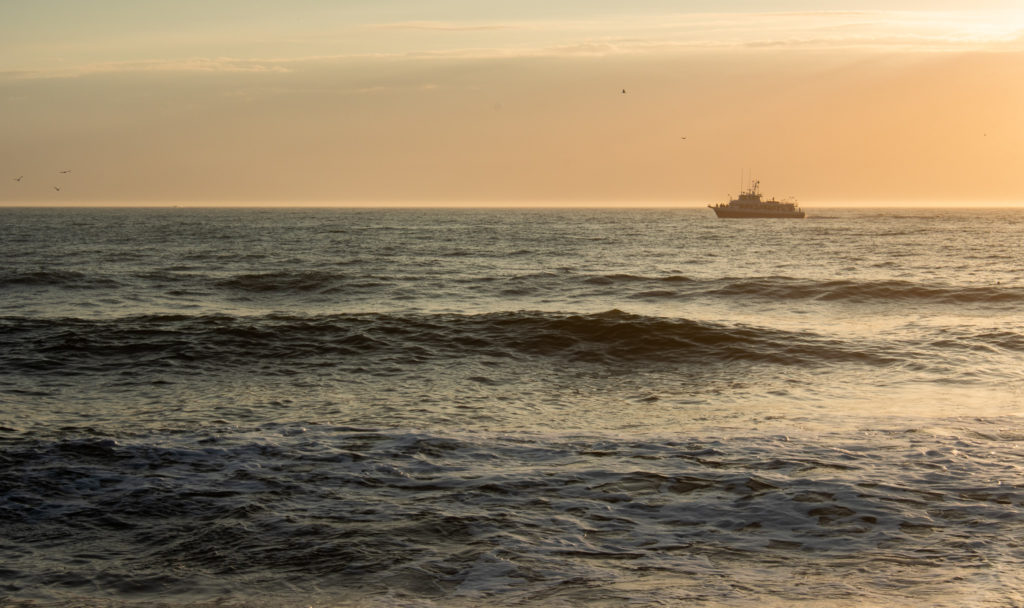
Yet another rule in photography is the rule of space. This rule states that the direction the subject is moving toward or looking towards should have more space than behind. For example, in the photo above, the boat is moving towards the left, so I moved my camera so the boat would be placed closer to the right. There is more space to the left of it, since it appears to be moving towards the left. Doing this implies that subject will continue to move in that direction, and it provides room for it to do so.
7. Fill the Frame
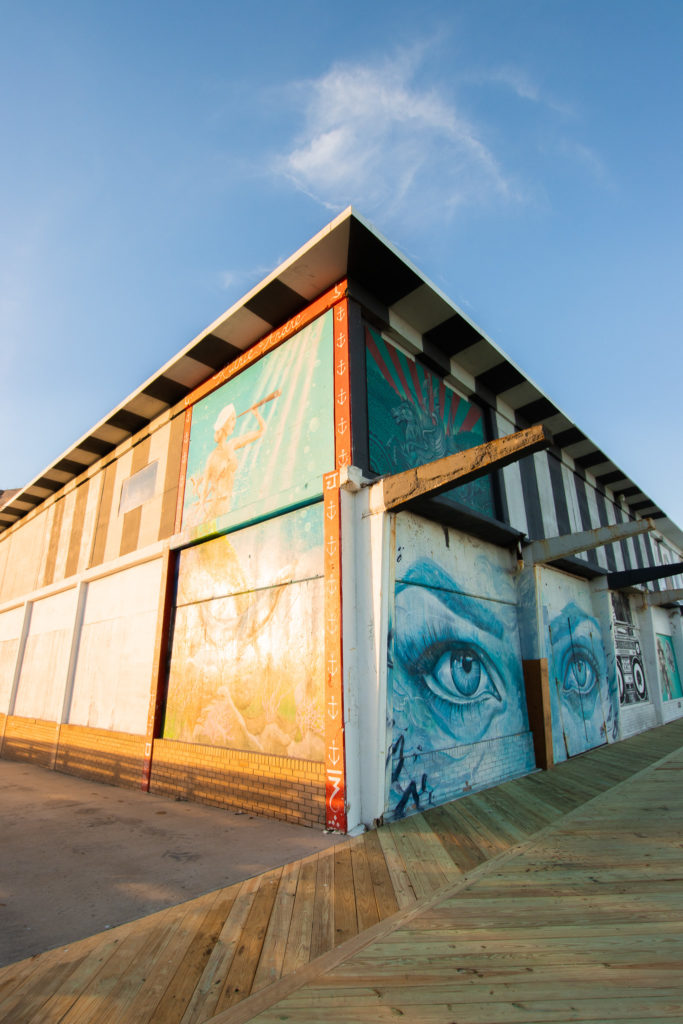
The opposite of minimalist photography is using a technique called filling the frame. In this case, positive space takes up majority of the frame instead of leaving empty space. This requires shooting close up to the point where the edges of the subject may be cut of on some sides of the frame. This will create a photo where everything in it is relevant to the subject.
In the photos provided, it is obvious what the subjects are, even though the not the entire subjects are shown. Emphasis has been placed on the subjects, and only the most important characteristics have been captured.
8. Framing
Framing is a technique used in photography that uses natural elements to frame the central focus of the photo. It helps place emphasis on your subject, move the viewer’s eyes towards it, and simply add more interest within the photo. Framing elements can be found in nature or they can be man-made. Some examples include trees, architectural doorways, windows, rock formations, etc. In this photo from the Philippines, the trees and mountains along the edges of the bottom half of the photo draw more attention to the main focus of the photo, which is where the blue water and main mountain in the center are located.
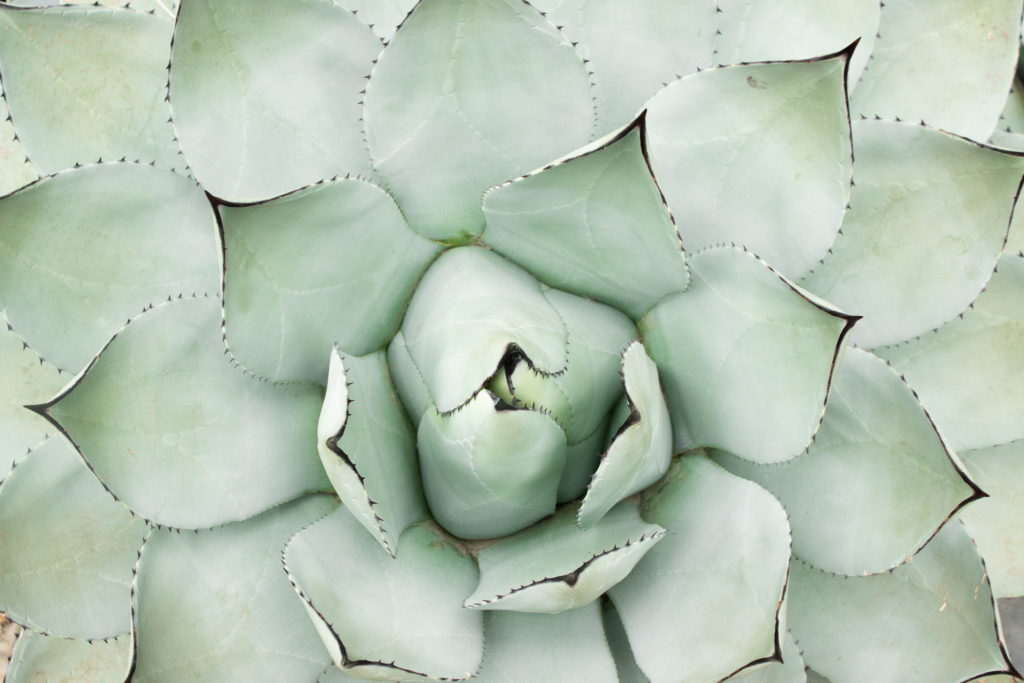
9. Patterns and Repetition
Always look for patterns in nature. They can be found almost anywhere and could be repeated lines, shapes, colors textures, etc. Patterns don’t always have to be completely uniform, they can still have a natural, organic shape, as shown in the photo above.the colors repeat, and the shapes repeat, but they are not completely identical. An important idea to keep in mind is to fill the frame. When shooting patterns you should compose your photo so the pattern reaches the edges of the photos to make it seem infinite. To do this, simply zoom in or move closer until the pattern reaches the edges of the frame. This will emphasize the effect of the pattern.
10. Texture
Textures in photography are defined as visual details that portray how something would feel if it were touched. The reason why textures are so important in photography is because bring photos to life by creating the illusion of physical touch. Textures can be shown through shape, color, highlights and shadows, etc. In the photo to the left, a bear had swiped at the bark of the aspen tree. By getting up close to the tree, I was able to capture the roughness of the bark and the scratch itself. The contrast in lighting defines the claw marks, causing them to stand out. The viewer can imagine the actions in real life that the photo captured.
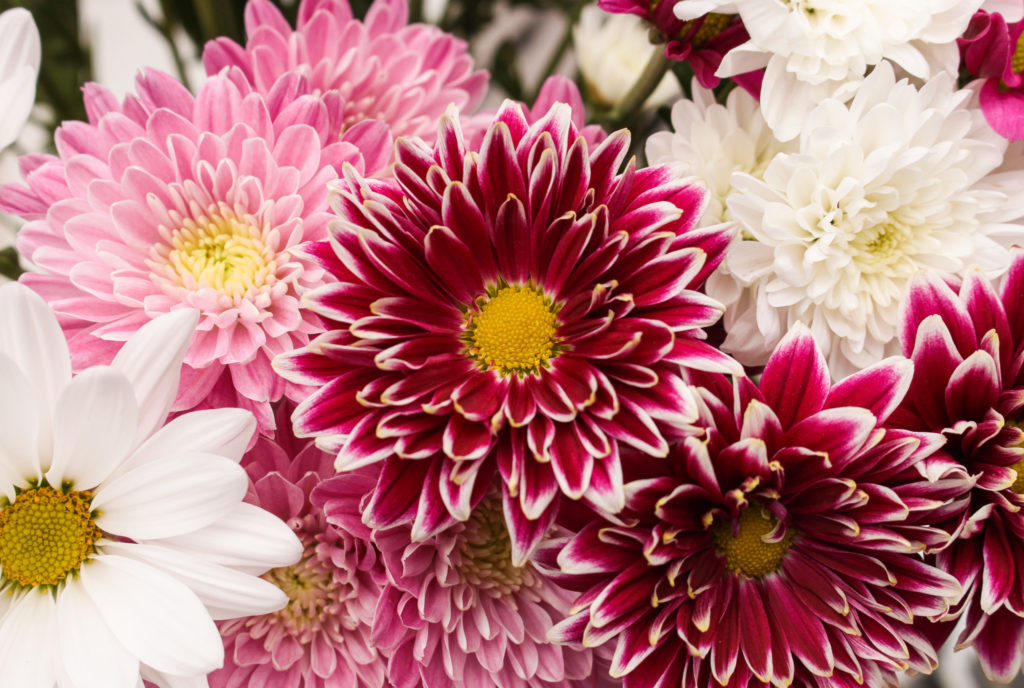
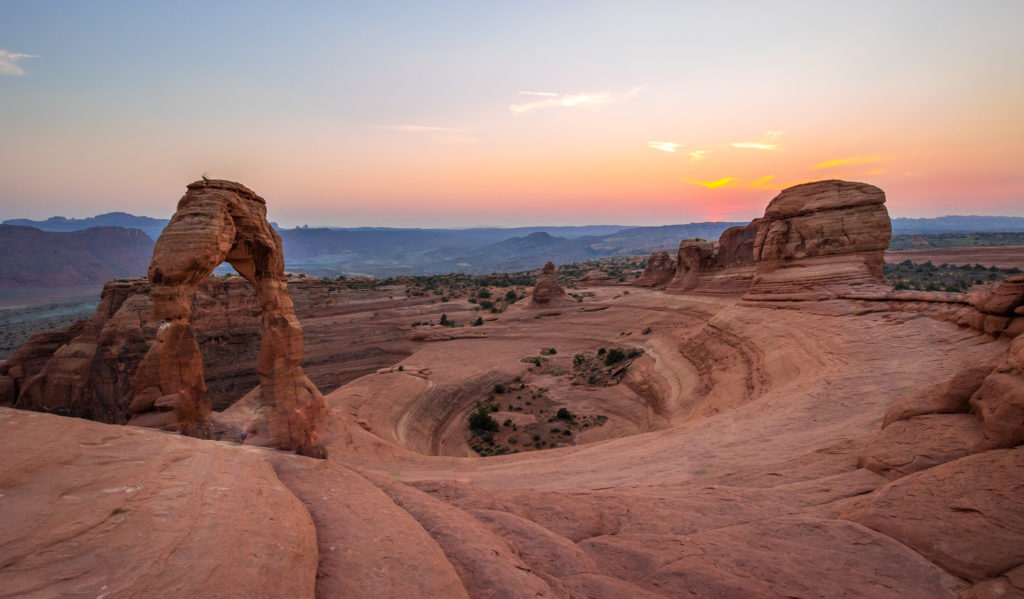
11. Color
Color is extremely important in composition, as it greatly affects the way a photo is perceived. Colors evoke emotions like joy, sadness, anger, and calmness and it attracts attention if used effectively. Colors can be used in contrast of one another, or cohesively as a pallet of colors that complement each other. Both methods can create a visually pleasing effect on your photos.
In this photo from Arches National Park, the subtle pink sky from the setting sun and the redness in the rocks go well together to create a color scheme that is very easy on the eye. In addition, to the matching blue in the upper portion of the sky and the distant mountains combine with the pink, resulting in a serene landscape that brings calmness to the viewer’s emotions.
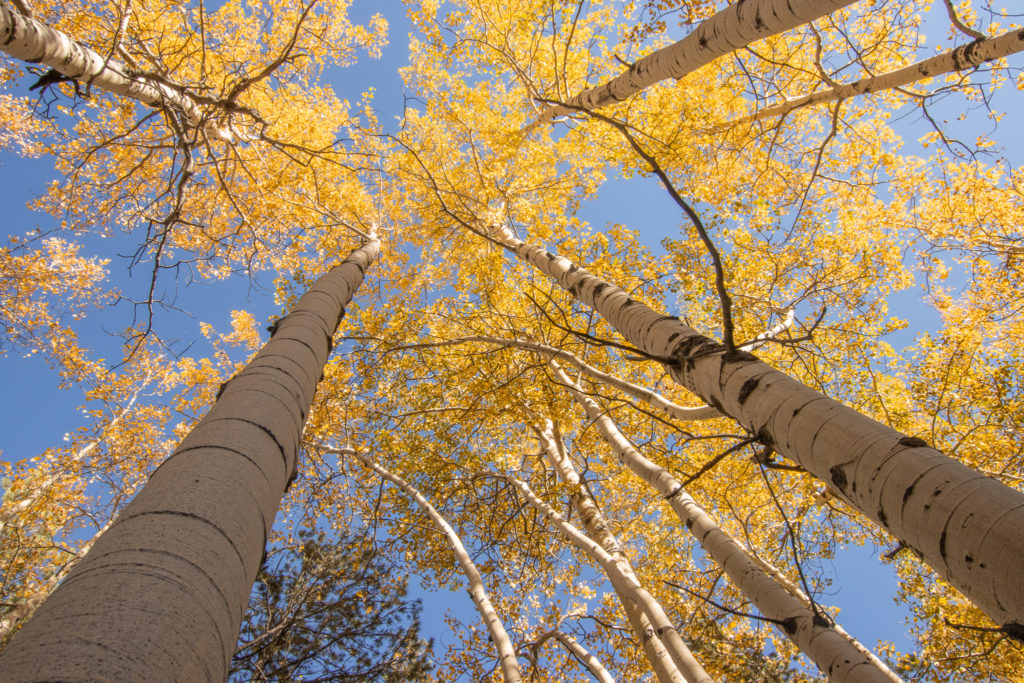
Complementary colors are colors that are opposite of each other on the color wheel. The pair used in this photo is blue and orange. I shot this photo in the middle of an aspen forest, on a clear sunny day. The golden color of the aspen leaves allowed the trees to pop out against the blue sky. If this photo was shot on a cloudy day, it would not have had the same effect.
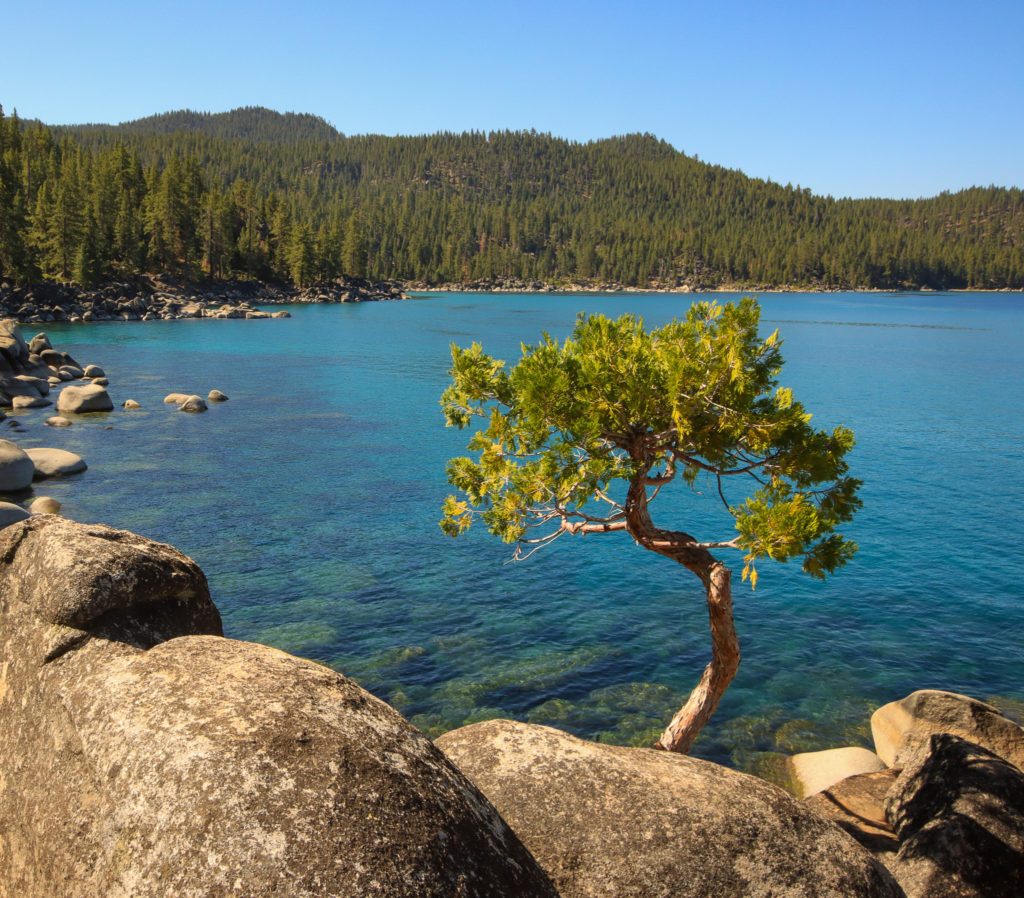
12. Depth
Depth in photography refers to the range between the nearest and furthest objects in the photo. It is crucial to add depth into your photos because it guides the eye throughout the photo and creates a three dimensional illusion in a two dimensional photo. When you’re composing a photo, try to think about the foreground, middle ground, and background and how they can be distinguished from one another. Leading lines, perspective, shooting through objects, and color can all help add depth to your photos.
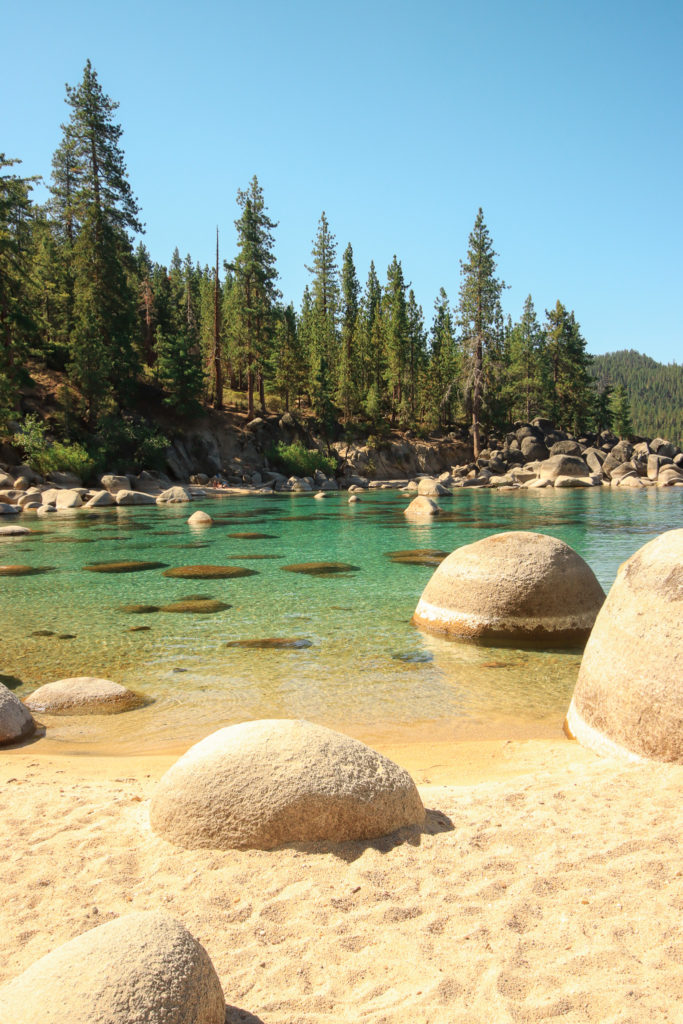
Take a look at this photo and notice the smooth rocks in the foreground that help lead the eye into the middle ground, and eventually the background. There are three clear sections of the photo that provide depth. The sand and rocks as the foreground, the water as the middle ground, and the trees and mountain as the background.
13. Diagonal Lines
Diagonal lines are an extremely powerful technique on photography composition. They help create a sense of depth as well as movement throughout the photo. Diagonal lines are any slanted lines in a photo. They can be found all over, from roads, to buildings, to shadows, to trees. You can also create your own diagonal lines by simply turning your camera to turn horizontal lines. To make your photos more dramatic, or to make your subject stand out, try incorporating diagonal lines.
14. Curved Lines
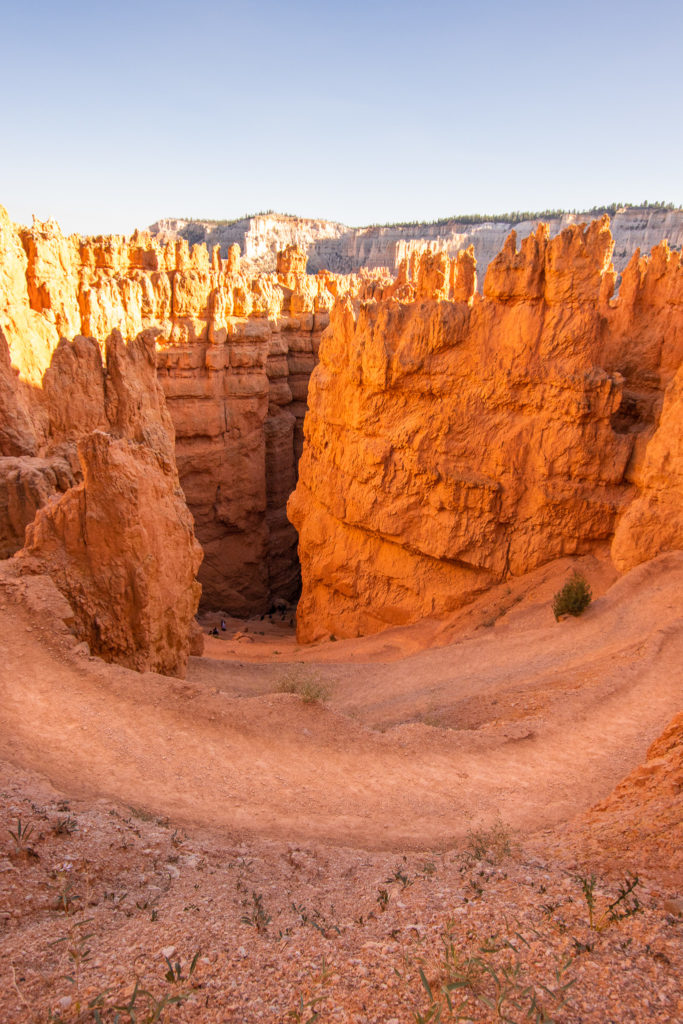
Contrary from diagonal lines, curved lines slow down the photo and create a calmer scene and a more serene mood. It takes long for the eye to follow a curve than a straight line, causing this calm feeling to take place. S-curves can help carry the eye throughout the photo and point out important details along the curve. Roads, rivers, and trails are all perfect examples of S-curves. If you are looking to create a natural and peaceful photo, keep your eye out for curved lines.
15. Avoiding Mergers
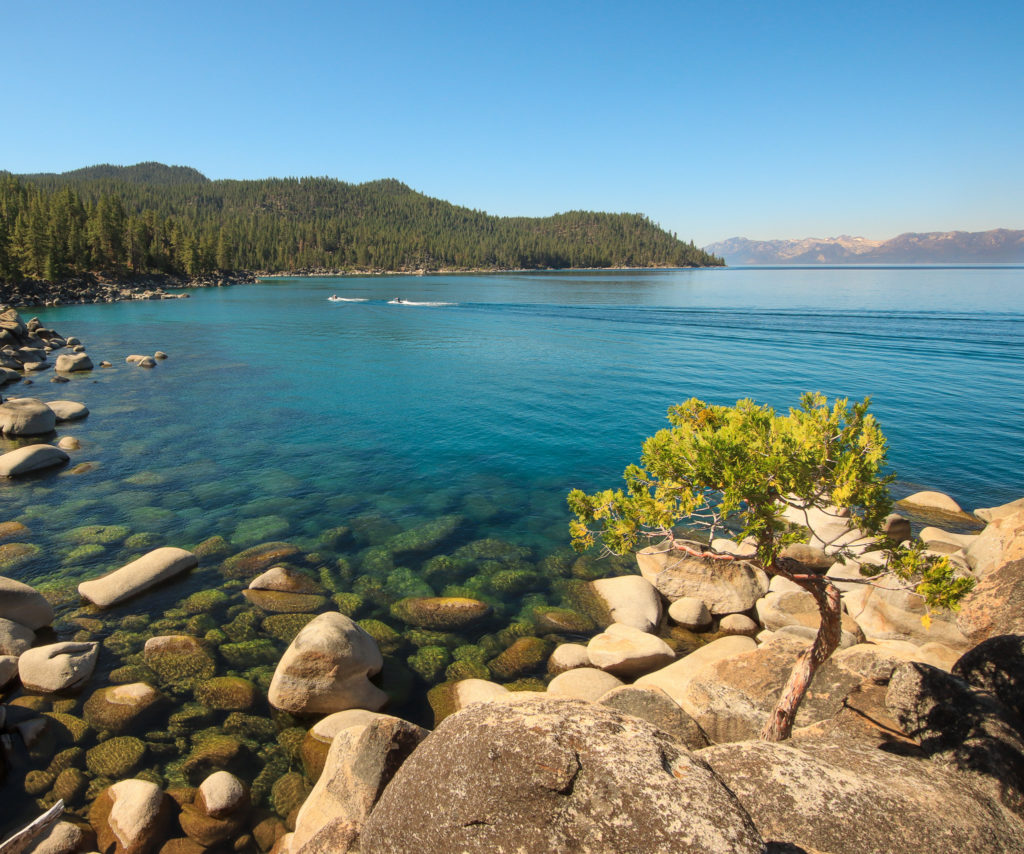
Although many of the other photography rules can be broken, mergers is one you always want to avoid. The first type is called a background merger, which occurs when something in the background of the photo interferes with the subject. It makes it difficult to distinguish the subject from the background. Objects that are similar in shape or color and cause this issue, like shown in the photo above. In the photo on the left, the tree is more difficult to see and it doesn’t stand out against the rocks behind it. By changing my perspective a little bit, I was able to put the tree against the blue water, and it stands out much more. Mergers are not difficult to avoid, just examine the entire scene in your viewfinder and check for mergers before you shoot. Try not to get hyper focused on only the subject and forget about its surroundings.
Another type of merger is called the border merger. this occurs when key parts of the subject are cropped out of the frame. It makes it difficult for the subject to stand out when key part of it are missing. this could be cropping off parts of people’s faces, or the legs of an animal, etc. In the photo on the left, part of the tree has been cut out on the left side. Notice how the subject looks much more grand in the photo on the right because all of it can be seen. It’s a lot to look out for when shooting, but it is crucial to notice and avoid mergers.
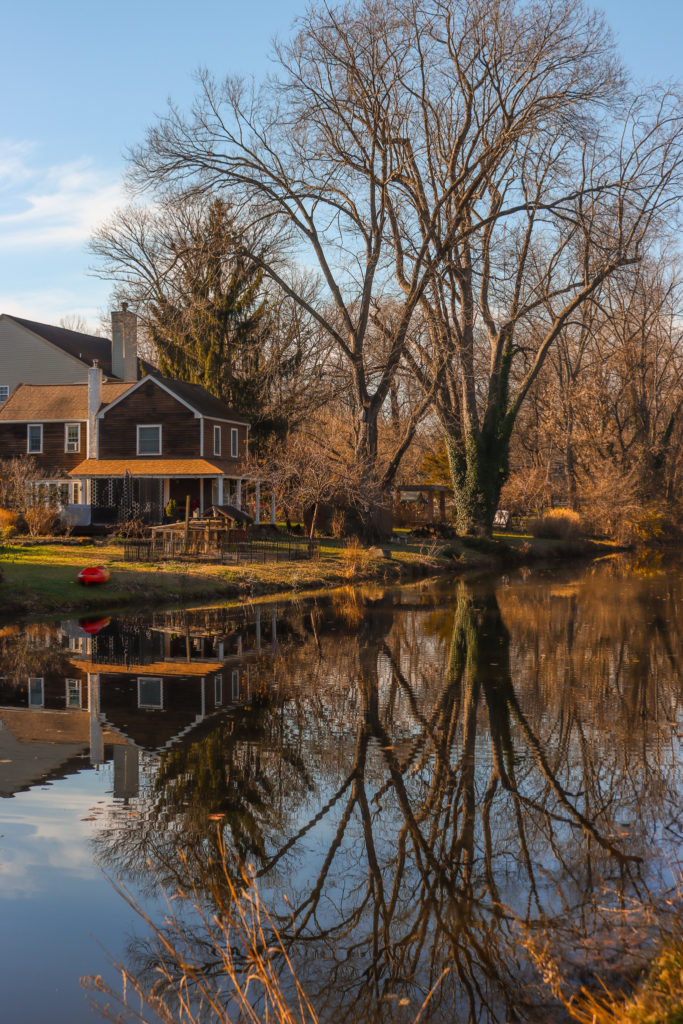
16. Reflections
The final technique I have to share is reflections. This is definitely one of my favorite techniques because it can completely change a simple, boring photo into something grand. Reflections can be created from rivers or lakes, or even just a puddle on the ground. Remember to try different angles and positions to capture the best reflection possible. Moving closer or lower may allow you to see more in the reflection!
Now that you’ve learned all of the rules of composition, you are ready for the most important part: practicing composing your own photos. Go and take a walk in nature and take time to thoroughly think about the photos you are shooting. Over time, your photos will significantly prove, and your eye for composition will become more natural.
If you like the photos you see in this post, click here to see more!