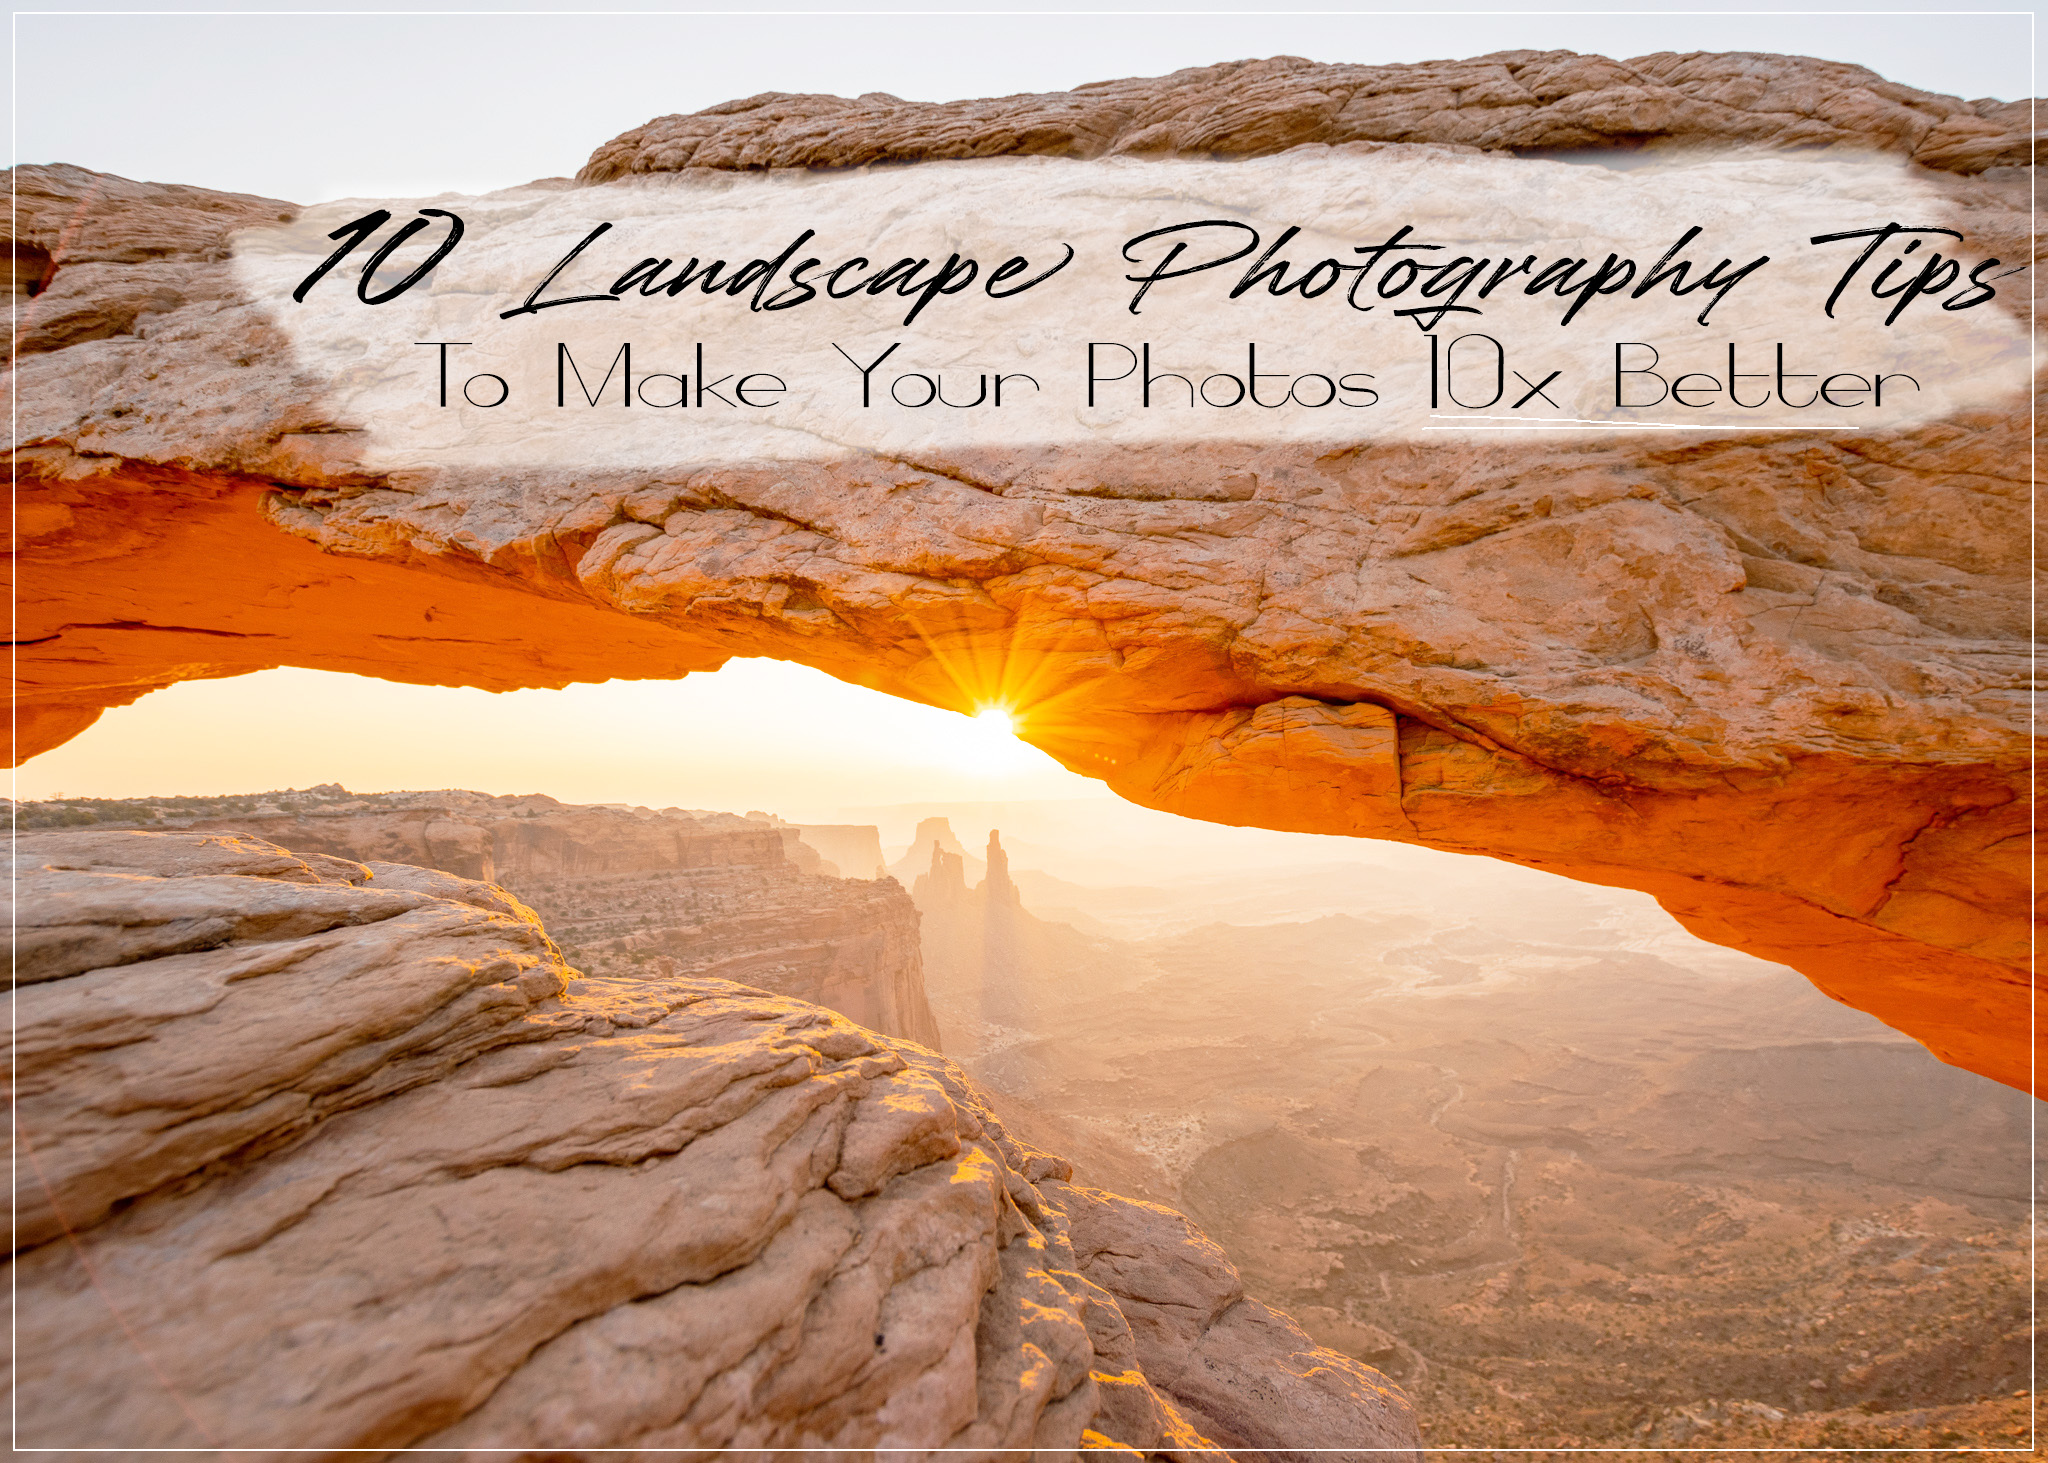
There are thousands of talented landscape photographers out there, making it difficult to stand out. I know from experience how tempting it is to go for the same exact capture you saw on the internet from that awesome photo spot. But if that photo is so famous online already, how is that going to make yours any different? Luckily, I have found many ways to improve your photos and make them one of a kind!
What is landscape photography? ———————————————————
Landscape photography is a genre of photography that captures the beauty of a natural scene of the outdoors. It is a very popular and valued field of photography, and by far my personal favorite. There is something special about exploring in nature and capturing everything it has to offer. I like being able to share the beauty nature with people who may not have the opportunity to see it for themselves.
1. Find A New Perspective
The first and most important thing to remember when taking landscape photos is to be creative. Finding new and better angles is essential to make your photos stand out. Get off the beaten path and find the spots that no one has seen yet. For example, in the photo above from Arches National Park, just about everyone has seen the photo on the left: the iconic photo of Delicate Arch. However, the photo on the right is different, and it took some rock scrambling to take it. But it’s one that will capture people’s attention. The photo on the left is still a great photo, as it’s always good to take that iconic photo. But in addition to that, take an original one that you can call your own.
2. Take Time To Compose
Patience. A trait I wish I naturally had more of. Patience is key in photography. This is something I had to teach myself as I started photography because I would just point and shoot, point and shoot. My photos lacked composition, one of the most important elements of landscape photography. As I continued to practice, I forced myself to slow down and think before shooting. I pretended I had a film camera, limiting the amount of photos I could take. Try to take a breath, relax, and think when shooting. Remember the rules of composition, like the rule of thirds, leading lines, etc. Doing this will improve the quality of your photos significantly.
3. Correct Exposure
One of the worst feelings for a photographer is going home after a photoshoot and seeing perfectly composed photos that are either too dark or have washed out highlights. When shooting in manual, be sure to check your exposure either after each photo or in the live view of your camera. Another way to check is to use the histogram feature, in your camera. A histogram is a graph that measures the brightness of photos, helpful for understanding which parts of your photo are too bright or too dark.
4. Use a Small Aperture
For landscapes, a mid-range to small sized aperture is really important, especially because it is hard to tell if part of the photo is out of focus through the small screen on a DSLR. Anywhere from f/11 – f/22 is ideal, f/16 being the magic number. At this setting, you are maximizing the depth of field, keeping your entire photo in focus even if there are objects in the foreground. Be careful using f/22, as lens diffraction may occur and lessen the quality of the photo. Try to only use it in necessary situations. In the photo above, I used f/16 and the whole photo all the way to the edges is sharp.
5. Time of Day
The time of the day can completely change a photo. It affects the color, mood, and perhaps even how you decide to compose the photo. In my opinion, it is extremely difficult to shoot in the middle of a sunny day. Of course it is still possible to get some good shots, but for me the best time to go out is golden hour, the hour after sunrise and the hour before sunset. I personally like to stay out for the entire sunrise or sunset, but golden hour will give you the best lighting for landscapes, lighting up the dark areas and not over exposing the bright areas. A good photographer can shoot at any time of the day, but if you only have an hour to shoot, make it at golden hour.
6. Always Bring a Tripod
Tripods are a must for landscapes, especially if you’re shooting sunrise or sunset. I like to carry mine with me every time I go out because I almost always end up needing it. Without a tripod, you are limiting yourself to shooting with a shutter speed of 1/80, 1/60 if you have a real steady hand. Having a tripod also expands your creativity, as you are able to manipulate motion in your photos. Long exposure photography is very appealing to the eye, and one of my favorites to do. In addition, if you are shooting by yourself and your photo needs a little bit more in the frame, just set up your tripod and now you have the option of adding yourself as a subject. It’s not much to bring with you, so just add it to your packing list when you go out!
7. Shoot In RAW
This one is a game changer. When I was first beginning photography, I thought this was way too confusing and over my head, so I always shot in JPG. Little did I know it is a very simple difference, but it makes all the difference in editing. To put in simple words, a raw photo contains all of the information that is captured in the camera. JPG is a compressed and processed version of the raw photo. Since there is so much more data in a raw photo, you are able to do a lot more with your photo in the editing process. For example, if you accidentally underexpose your photo, but you shot in raw, you will likely be able to bring back a lot of the detail in the shadows when you edit. However, if you shot in JPG, you will get a noisy, low quality appearance when you raise the shadows since the data was compressed. Shooting in raw has saved many of my improperly exposed photos, it will help you so much when you edit! Just keep in mind that raw files are a lot bigger, therefore taking up a lot more space on your memory card.
8. Don't Delete Photos
You aren’t going to love every single picture you take, but don’t be too quick to get rid of them! A lot of times photos don’t look great in the preview screen of the camera, but if you give it a closer look on the computer, you may see that it’s worth keeping. Sometimes all it needs is some basic adjustments in Lightroom and it’s good to go. Don’t risk losing a good photo, just keep an extra sd card with you to store more photos.
9. Research You Location
Don’t forget to search up where you’re going to shoot! Google Maps and Google Earth are your best friends! Be sure you know how to get there, where the best photos spots around are, and where you will be able to access. Doing this will help your creativity for composition flow once your get to your location. You won’t be randomly pointing your camera because you will already know what you are going to do.
10. Critique Yourself
After each photoshoot session, take some time to look through your photos and examine them closely. Think about what you did well and what you can improve on. Was your exposure correct? Was your photo well-composed? Is the photo in focus? Don’t be afraid to be a little bit hard on yourself, while also being proud of the improvements you’ve made. Self critique will help develop your eye for photography and give you an idea of what you need to do for your next shoot.
Enjoy landscape photography! It is the genre of photography that allows you to be free to explore the world and capture everything it has to offer! You have the ability to create your own picture, and encompass it with the beauty of nature. Bring your camera everywhere; you never know when an opportunity will occur. Be patient with it. Just like anything else, improvement comes from thousands of photos worth of practice!