Kolob Canyon is a quiet section of Zion National Park located towards the northwest. Just because it is quieter, does not mean it’s not as beautiful as the main canyon in Zion. Its huge sandstone peaks and canyons create a serene setting for hikers that cannot be found in other southwestern parks. The unique wildlife and history of this area is absolutely worth the trip.
How To Get There
The parking lot is located in Kanarraville, off of Old U.S. 91. You will find the parking lot on your left at E 100 N st, just past the E 300 st. intersection. The trailhead is very easy to access, no 4 wheel drive vehicle is required. All roads to the trailhead are paved. Parking is free, and restrooms are available at the trailhead, but there are no facilities on the trail.
Best Time To Visit
Really the best time to do this hike is in the summer. The water is warmest at this time of year, and you don’t have to worry about the crowds since permits limit the amount of people allowed on the trail each day. With that said, you should plan weeks or even months in advance and purchase the permits ahead of time if you plan on visiting during summer. I did the hike in October, and the water was very cold, but if you have neoprene socks, then you will be okay. I wouldn’t recommend doing the hike between November and March, as the water is dangerously cold. In the spring, snowmelt will cause the river to be much higher, and the water will still be cold. In my opinion, May through September is ideal for hiking this trail.
Fees
Permits are required for this hike, in order to limit the amount of people on the trail at a time. There is a limit of 200 people per day, and this can fill up very fast in the summer, so plan ahead and buy permits early. Permits are $15 per adult (8+), and children 7 and under are free. You can buy your permit online and redeem it at the booth in the parking lot.
What To Pack
Sturdy hiking shoes – these are a must on most trails, but this one especially. You will be hiking through water for a decent portion of the hike, and the rocks underneath are slippery. Proper shoes will help keep you safe.
Hiking poles – these are super helpful since the ground under the river is uneven and unstable. Use poles to help keep your balance and check if rocks are stable before stepping on them.
Plenty of water – always bring more water than you think you need. Although the shade on this trail will protect you from the sun, dehydration is still a risk.
Neoprene Socks (if it’s winter) – if you’re not doing this hike between May and September, the water will be very cold. Wear these socks to prevent your feet from going numb!
Downloadable map – this trail is very well maintained and easy to follow (just follow the river), but it is always good to have a map for the rare occasion you get lost. There is no reception on this trail, so make sure you have a downloaded map.
Overview
Length: 4.0 miles
Difficulty: moderate to strenuous
Elevation gain: 700 feet
Estimated time: 3 – 4 hours
Family Friendly? I do see families and people of all ages able to complete this hike, but just be aware it does require some physical fitness due to the elevation gain, and walking through the river.
Dogs? No, pups will have to stay at home. this trail does not permit dogs.
Detailed Walkthrough
The trail begins on a dirt road, and continues on the road for the first .8 miles. Then it will lower into a small canyon with trees and rocks and start to follow the creek. This part of the trail looks amazing in the fall when the leaves change. Expect to cross the creek several times in this portion of the trail. Your feet will likely get wet already, but depending on the water levels, you may be able to hop over using rocks as stepping stones.
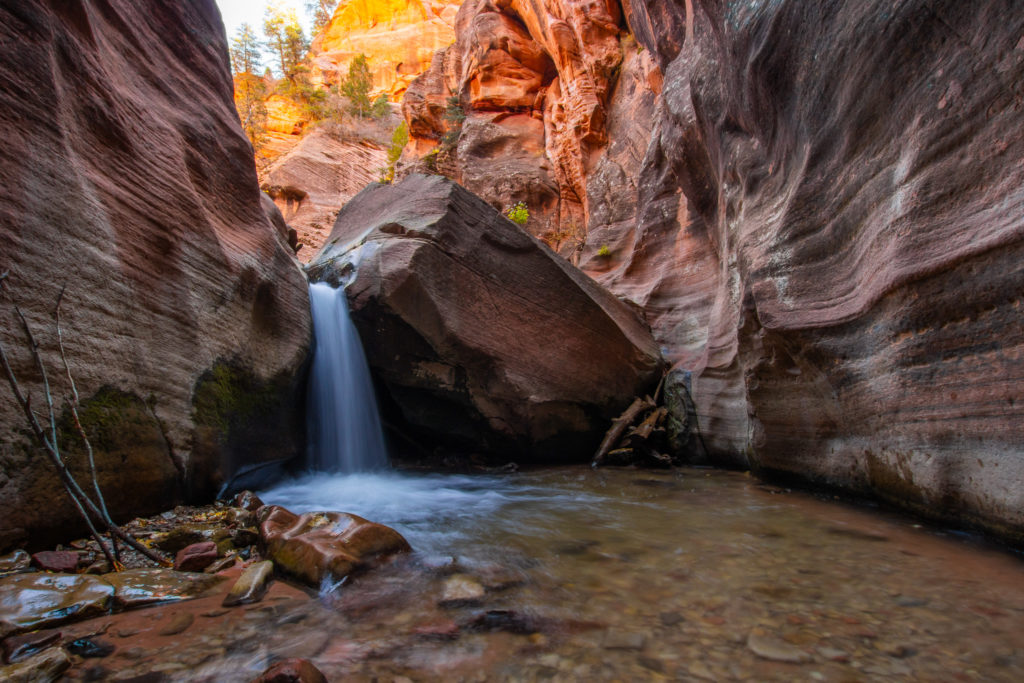
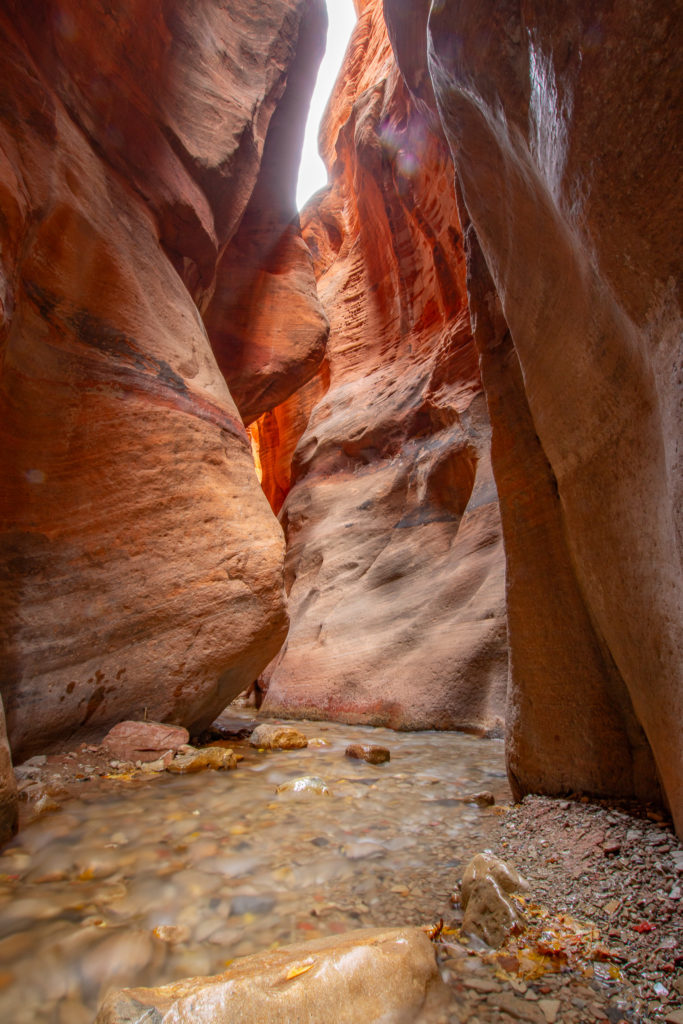
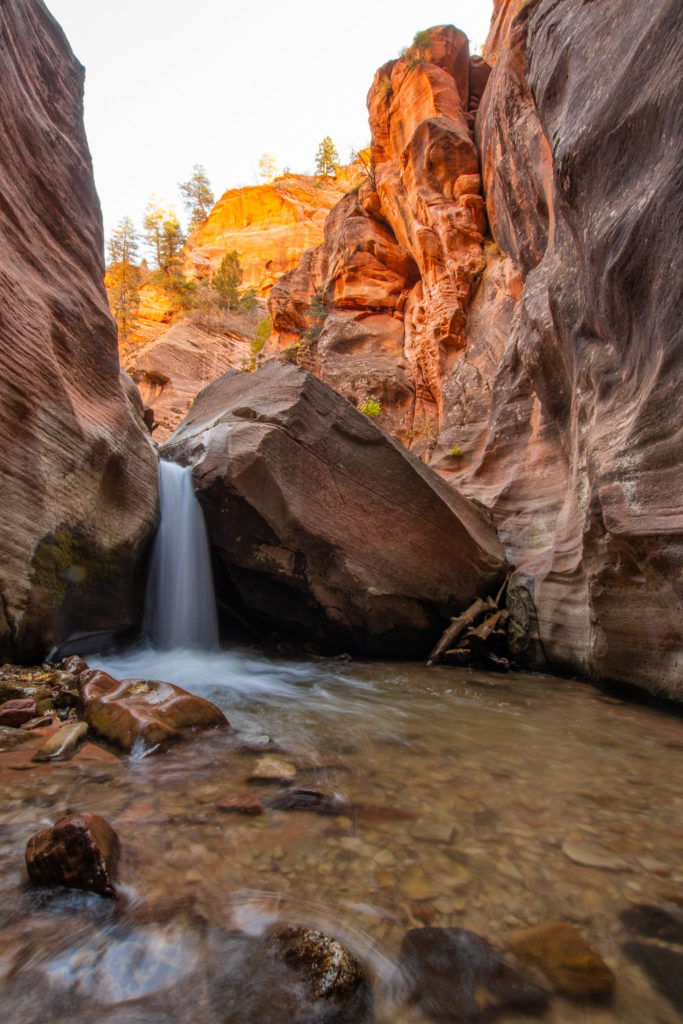
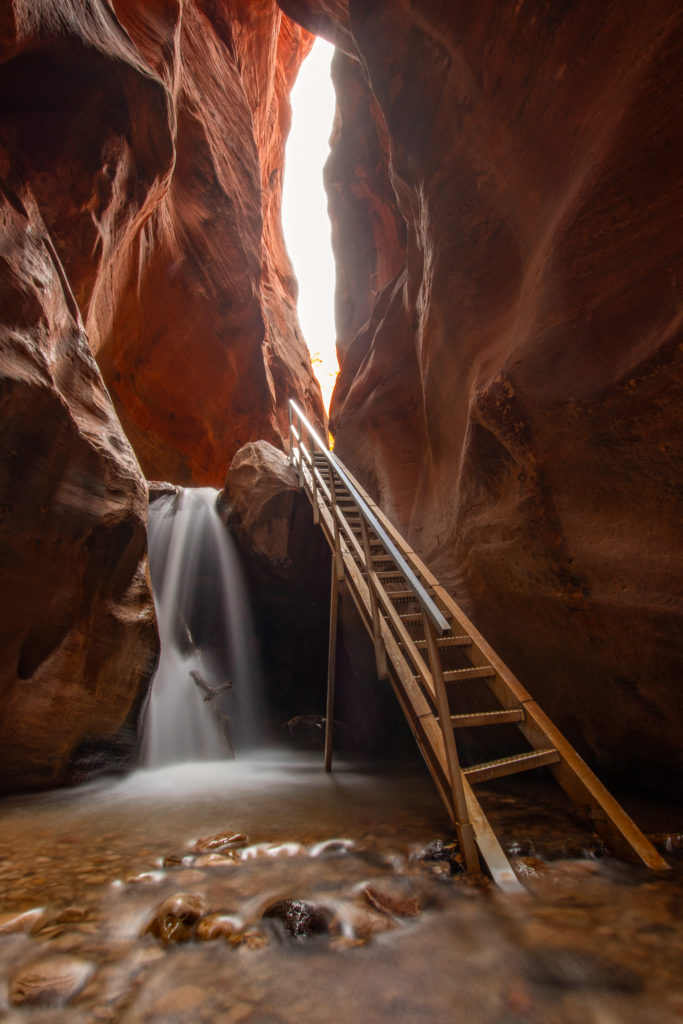
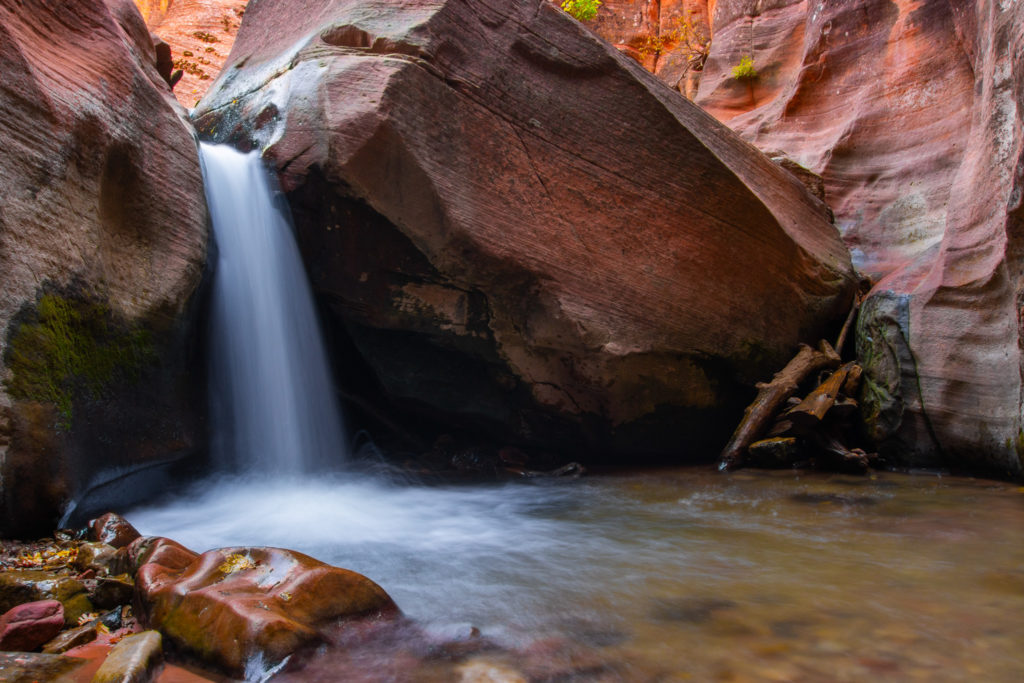
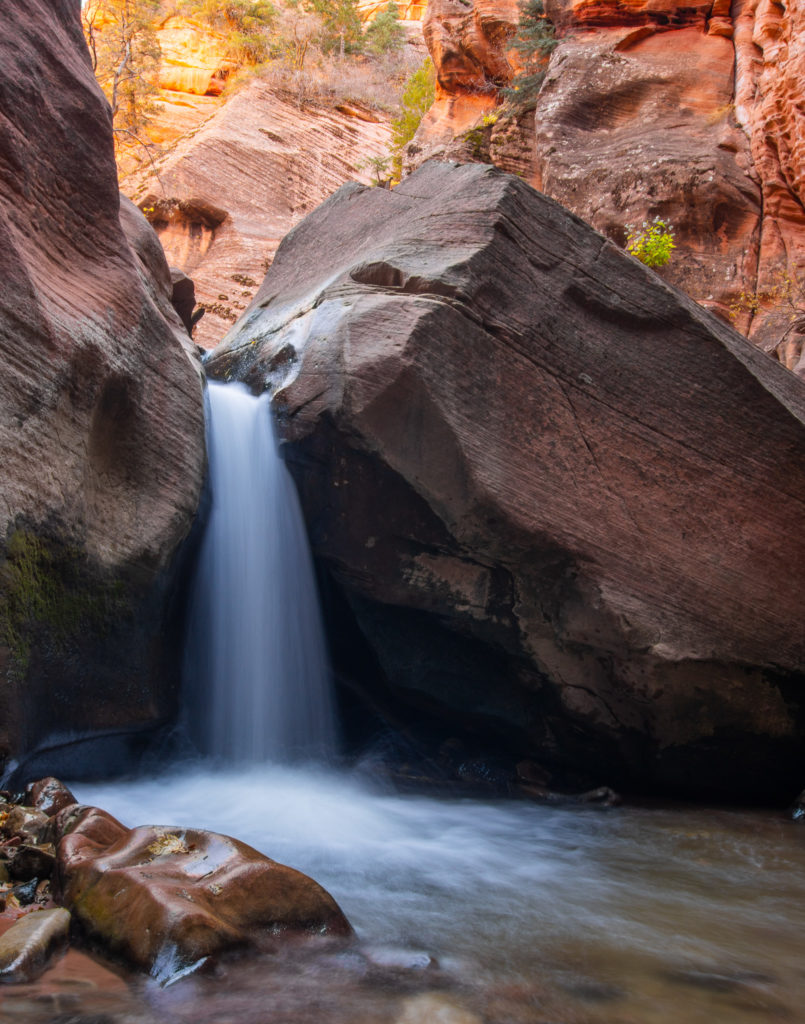
The trail will begin to narrow into the creek, and the creek will become the trail. Follow the creek all the way to the first waterfall, and do not try to hike on the sides to avoid the water, this will cause erosion and ruin the area. The water should not be more than a foot high, and levels will vary in different areas. The creek will begin to enter a slot canyon type of formation, and this is where the hike gets really cool. You will be surrounded by smooth canyon walls as you hike, and eventually you will reach the first waterfall, which is about 15 feet high. You can climb the ladder to continue past, which has just recently been replaced with a newer, sturdier one. Just past the ladder is the second waterfall situated between large boulders.
You can climb past the boulder to see another nearby waterfall, but it is more difficult than the rest of the hike. If you are feeling adventurous, go for it, but once you reach the third waterfall, do not go any further. Past that area is private property and it is extremely difficult for rescue teams to access the area.
Notes + Tips
Always check the weather before you hike. If there is any rain on the forecast, do not go! Flash floods are extremely dangerous and very possible when it rains.
If you are into photography, bring a tripod to capture some amazing long exposure photos of the waterfalls and the flowing creek.
I would like to emphasize the importance of proper equipment on this hike. You will feel much safer and warmer if you wear the right shoes and clothes and bring hiking poles.
Overall, this hike is very enjoyable for those who love adventure and nature. Even if that’s not your thing, the water fall views at the end make it all worth it!
Love These Photos?
Click here to see more photos from Kanarra Falls and the United States! All photos are available for purchase as high quality downloads.